Ultra Hard Mode is an optional extra on top of Hard Mode. You supervise your own iPhone or iPad once with Apple Configurator on a Mac, which erases it, restore your backup, then install Clearing’s profile from Protect > Hard Mode > Ultra Hard Mode. Clearing’s DNS filter then can’t be switched off in Settings until Hard Mode ends.
What Ultra Hard Mode is, and who needs it
Hard Mode already keeps Clearing on your iPhone or iPad: for the 30, 90 or 365 days you choose, the app can’t be deleted on impulse and leaving early takes 48 hours. One gap stays open. Clearing’s DNS filter is a system setting, and iOS lets you switch it off in Settings > General > VPN & Device Management.
iOS only accepts a profile that needs a password to remove on a supervised device. Supervision is the mode schools and companies use for the devices they own. Ultra Hard Mode means you supervise your own iPhone or iPad, so Clearing’s profile can close that gap.
Most people don’t need it. Hard Mode alone turns a two-second impulse into deliberate steps, and that is often enough. Ultra Hard Mode is for people who know they will go into Settings at 1 a.m. and want that door closed too. It takes about an hour, erases the device once, and needs a Mac.
What you need before you start
- A Mac with Apple Configurator. It’s free on the Mac App Store. Apple Configurator 2.21 needs macOS 15.7 or later. Without a Mac you can’t set up Ultra Hard Mode.
- A USB or Thunderbolt cable that connects your iPhone or iPad to the Mac.
- Clearing on the device with Hard Mode running. You install the profile at the end, after the restore.
- A fresh iCloud backup and enough time to restore it. Supervising erases the device.
- Any VPN apps (for example Tailscale or a work VPN) and other profiles (beta, school, work) you will need in the coming months. Once Clearing’s profile is installed you can’t add new ones, so set them up after the restore and before the profile.
Step 1: Back up and supervise your iPhone or iPad
These steps follow Apple’s Apple Configurator User Guide. The Clearing screens and the empty Apple Configurator window below are real screenshots; the Prepare steps and the iOS Settings screens are drawings of what you’ll see. If your version words a button slightly differently, follow what you see on screen.
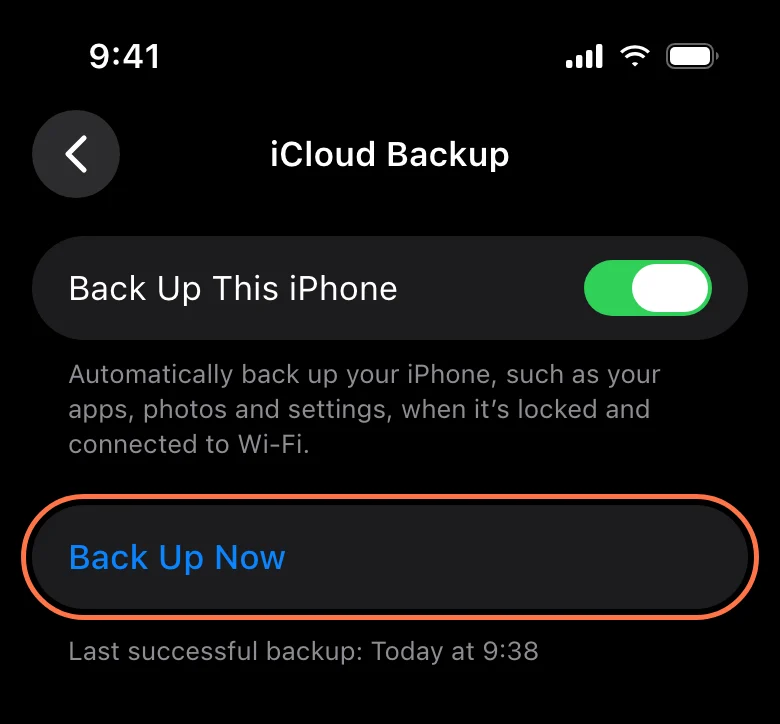
- Back up to iCloudOn the device, open Settings, tap your name, then iCloud > iCloud Backup and tap Back Up Now. Stay on Wi-Fi until it finishes and check the date and time under it.
- Turn off Find MySettings > your name > Find My. This keeps Activation Lock from holding up the erase. You turn it back on after setup.
- Connect the device to the Mac and trust itOpen Apple Configurator on the Mac and plug in the device. The first time, tap Trust on the device and enter its passcode. The device then appears in the window.
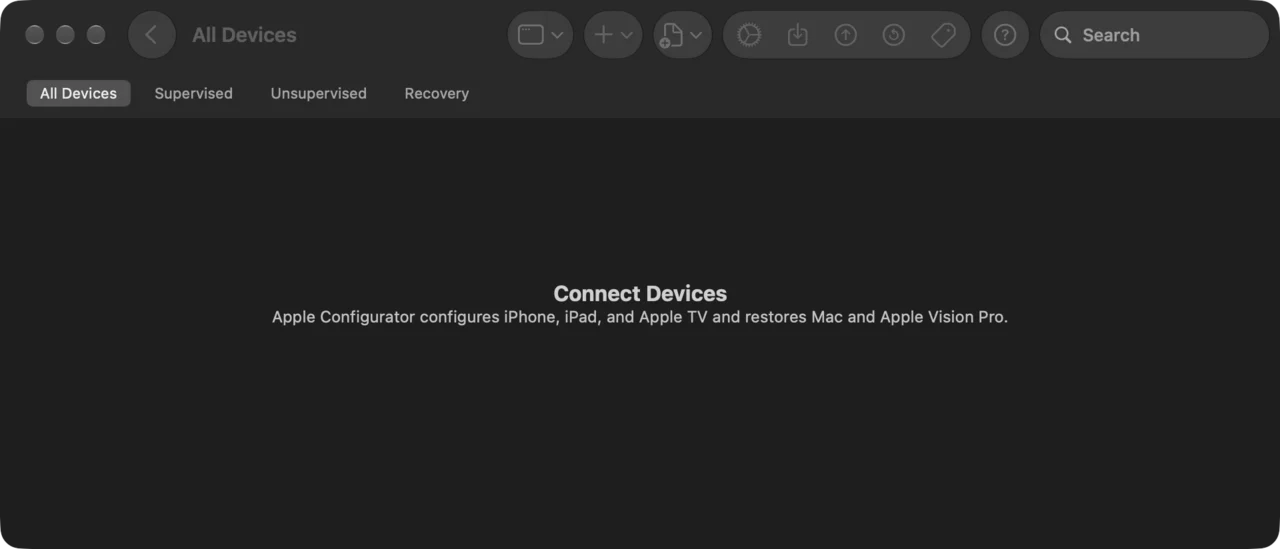
Apple Configurator before a device is plugged in. - Select the device and click PrepareSelect it in Apple Configurator, then click Prepare in the toolbar (or choose Actions > Prepare). The Prepare Assistant opens.
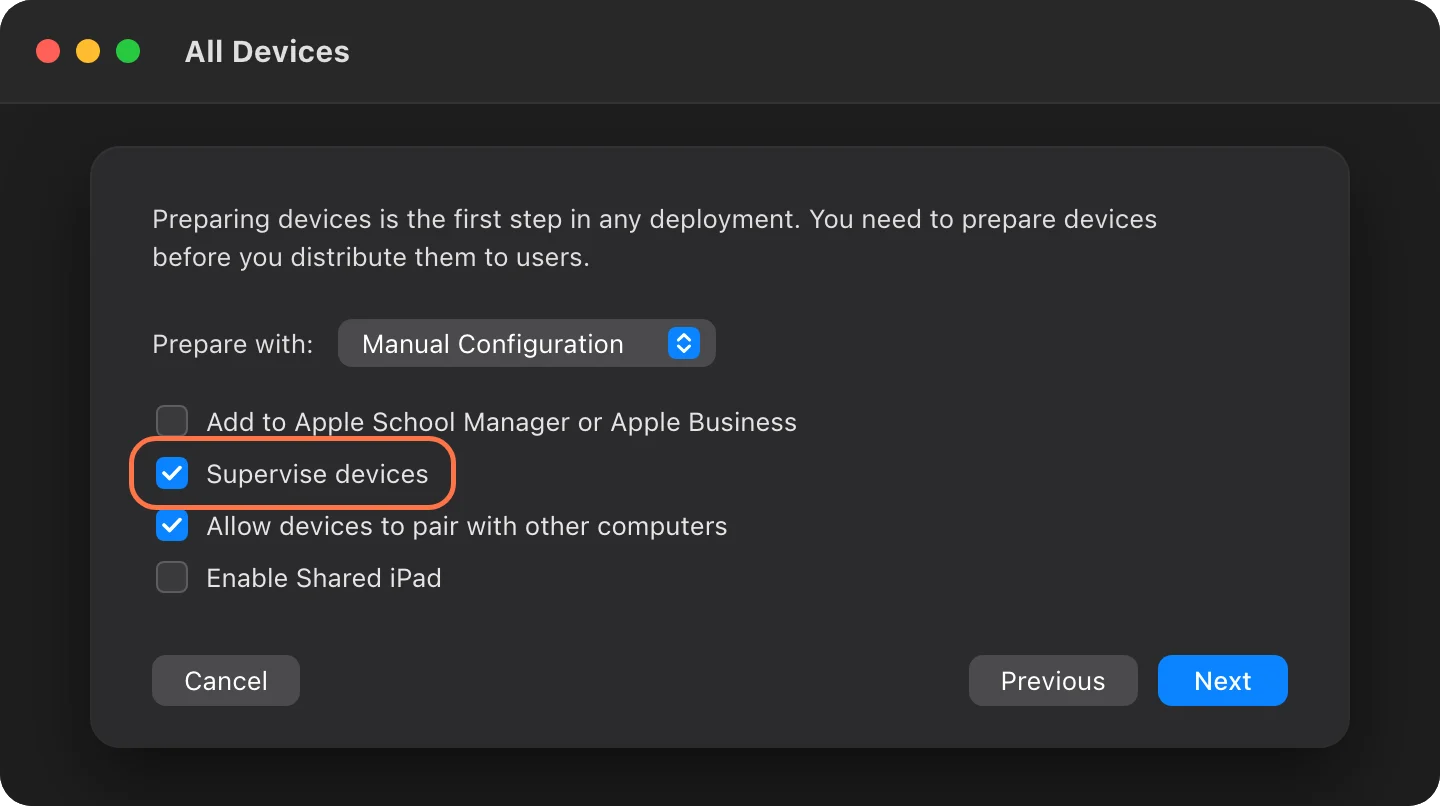
- Choose Manual Configuration and tick Supervise devicesSet Prepare with to Manual Configuration and tick Supervise devices. Tick Allow devices to pair with other computers only if you back up or sync with a Mac or PC other than this one. Leave Apple School Manager or Apple Business and Shared iPad off. Click Next.
- Choose Do not enroll in Device ManagementPick it from the Server menu and click Next. If you’re asked for a Managed Apple Account, click Skip. No MDM server and no Apple Business Manager are involved.
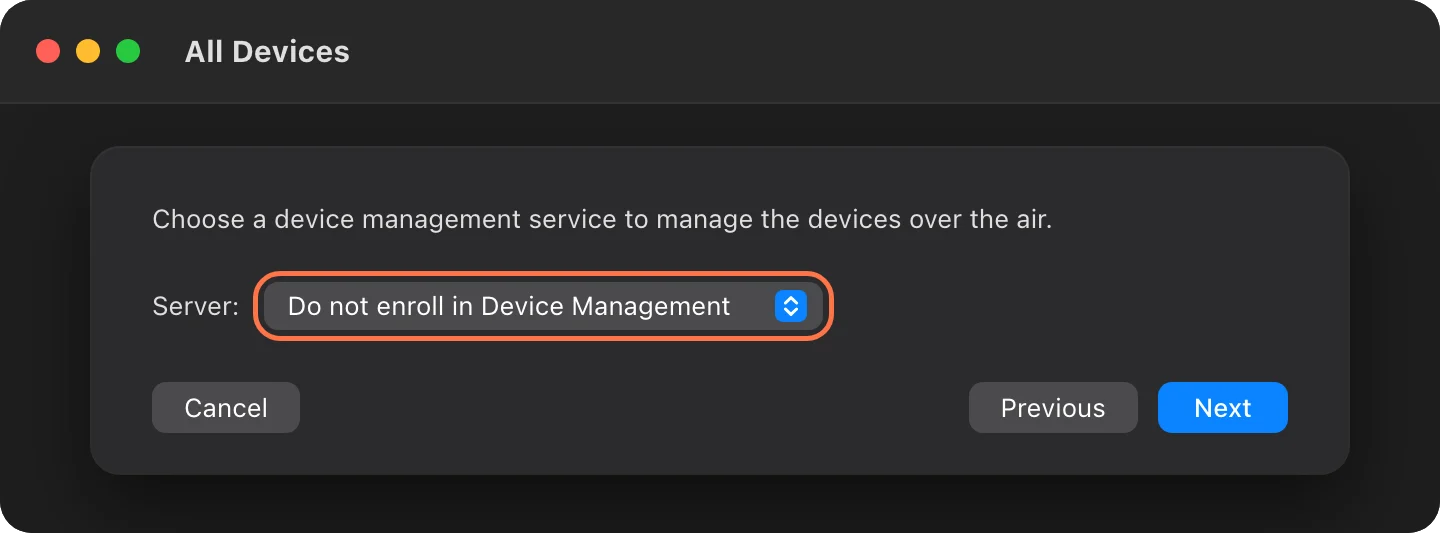
- Create an organization with your own nameSupervision needs an organization; only the name is required. It becomes the device’s supervision identity and shows on the device.
- Choose the Setup Assistant panesPick which Setup Assistant panes to skip. Skip nothing you’re unsure about, and keep the pane for transferring your apps and data so you can restore your backup.
- Click PrepareApple Configurator may offer a Wi-Fi profile; Apple notes the device needs internet during preparation, through Wi-Fi or through the cable with Internet Sharing from the Mac. This erases the device. Apple warns not to shut down the Mac while it prepares.
- Restore your backupGo through Setup Assistant on the device and, on Transfer Your Apps & Data, tap From iCloud Backup and choose the backup you just made. Turn Find My back on afterwards.
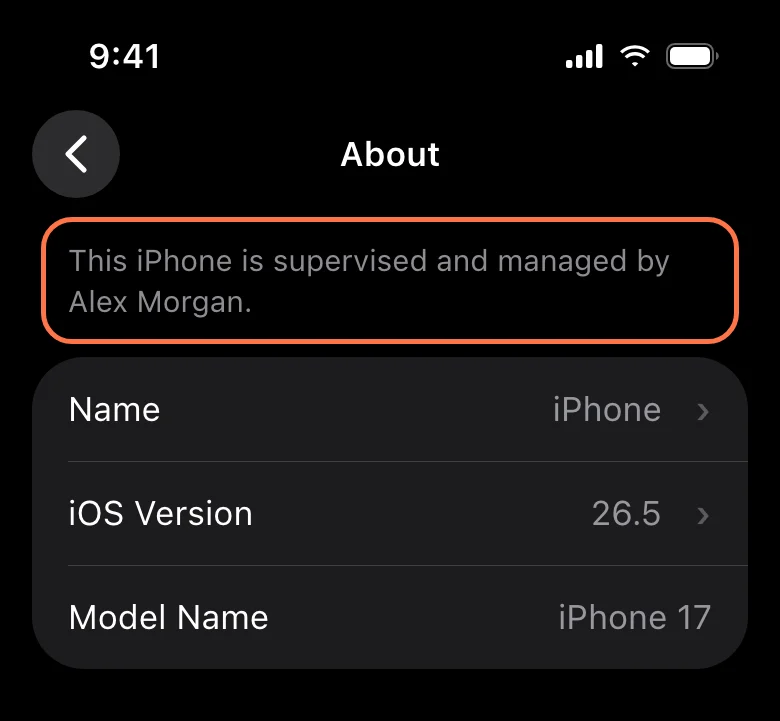
Check that it worked: Settings > General > About shows a line under the device name saying this iPhone or iPad is supervised. The Lock Screen also shows that the device is managed by your organization, which is you.
Step 2: Install the profile in Clearing
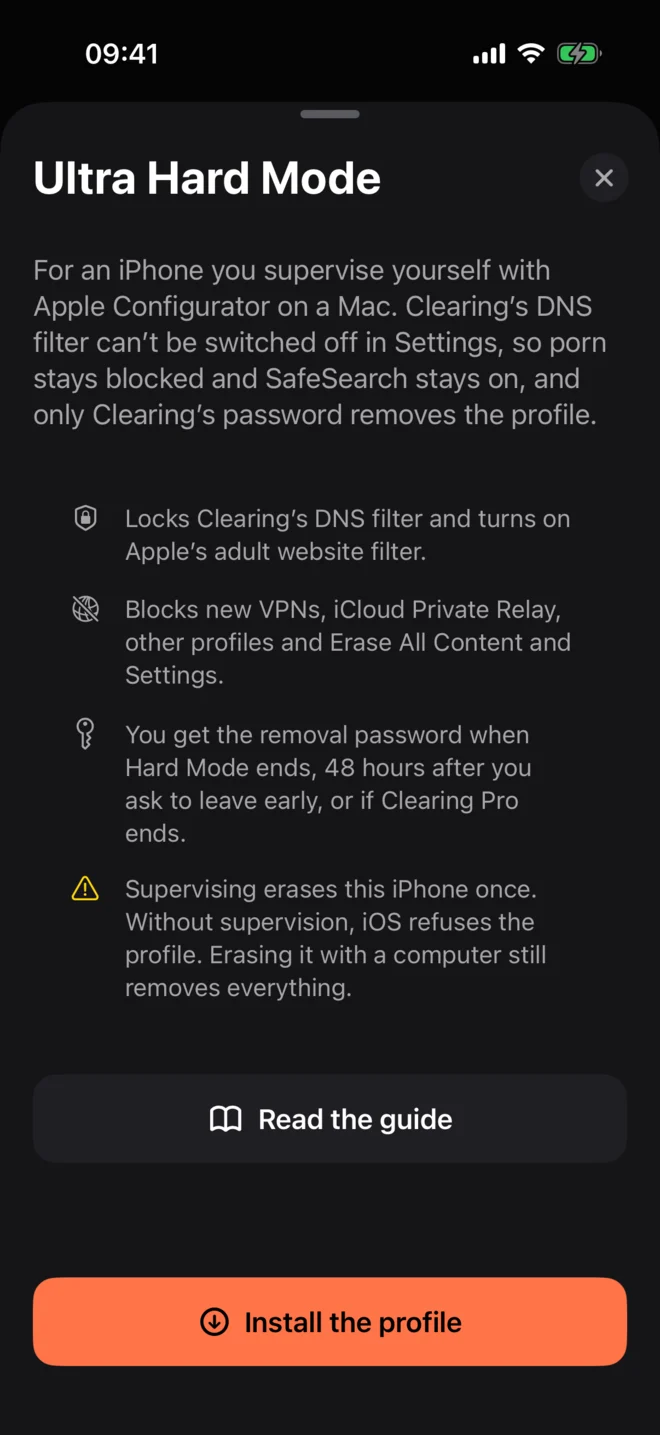
- In Clearing, tap Install the profileOpen Protect > Hard Mode > Ultra Hard Mode. Hard Mode has to be running. Tap Install the profile; Safari opens.
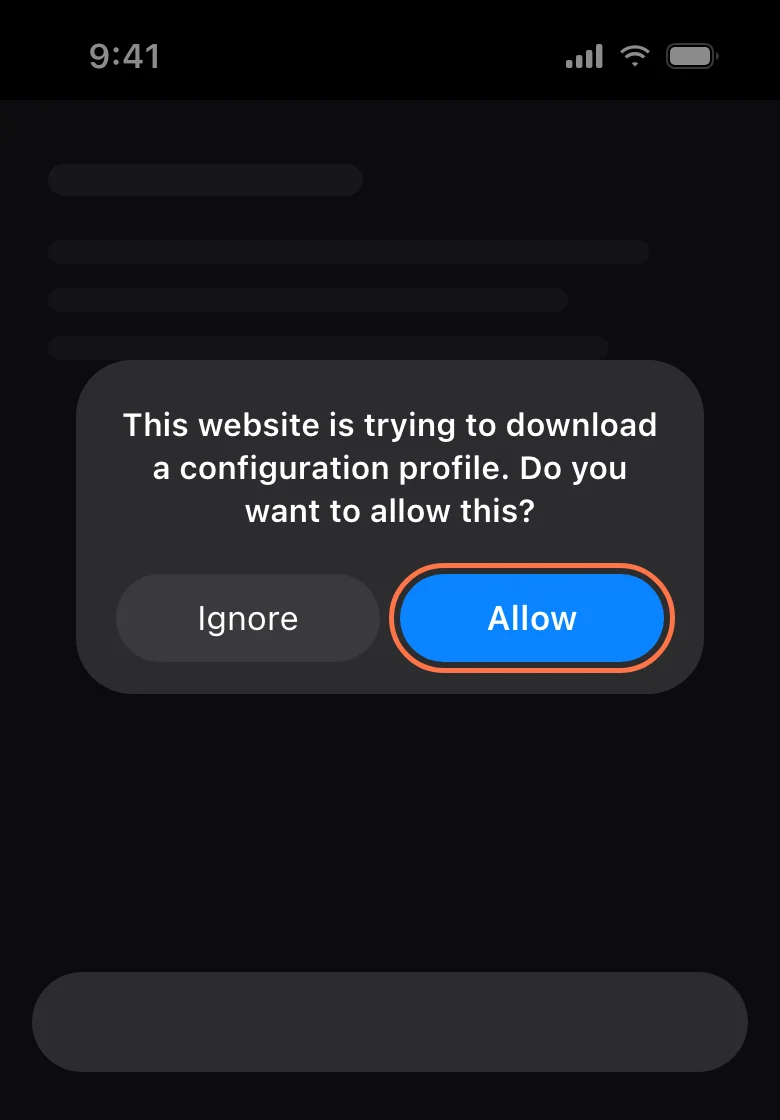
- In Safari, tap AllowSafari asks whether to download a configuration profile. Tap Allow to download it.
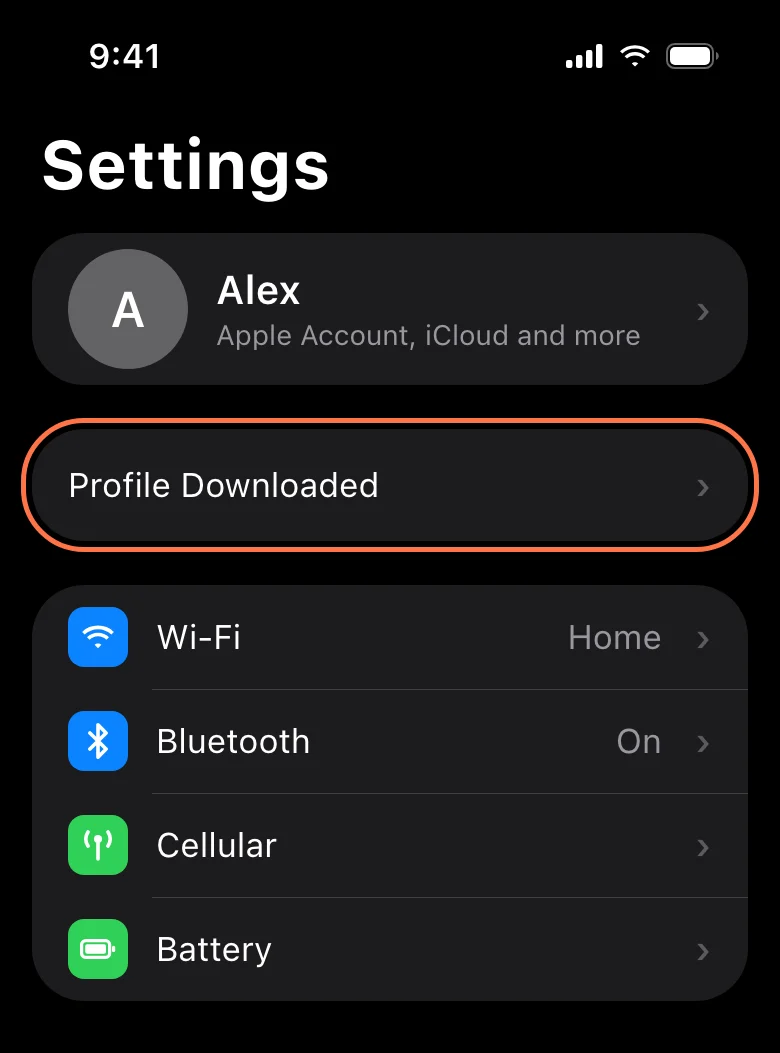
- Open Settings and tap Profile DownloadedIt appears near the top of Settings, under your name. If the entry has gone, tap Download again in Clearing.
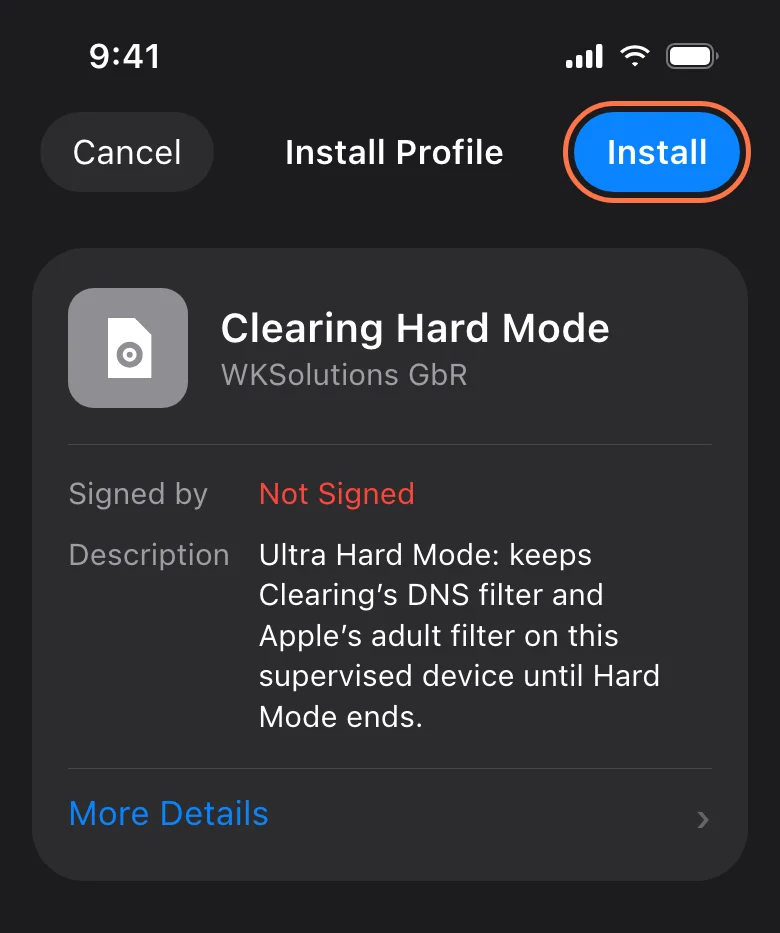
- Tap InstallThe sheet shows Clearing Hard Mode from WKSolutions GbR. Tap Install, enter your passcode and confirm.
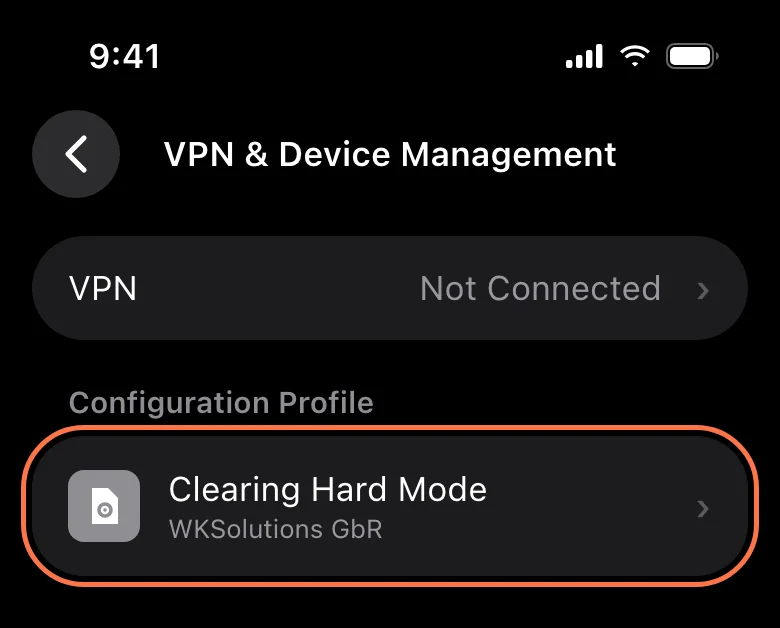
- Check it’s thereSettings > General > VPN & Device Management now lists Clearing Hard Mode.
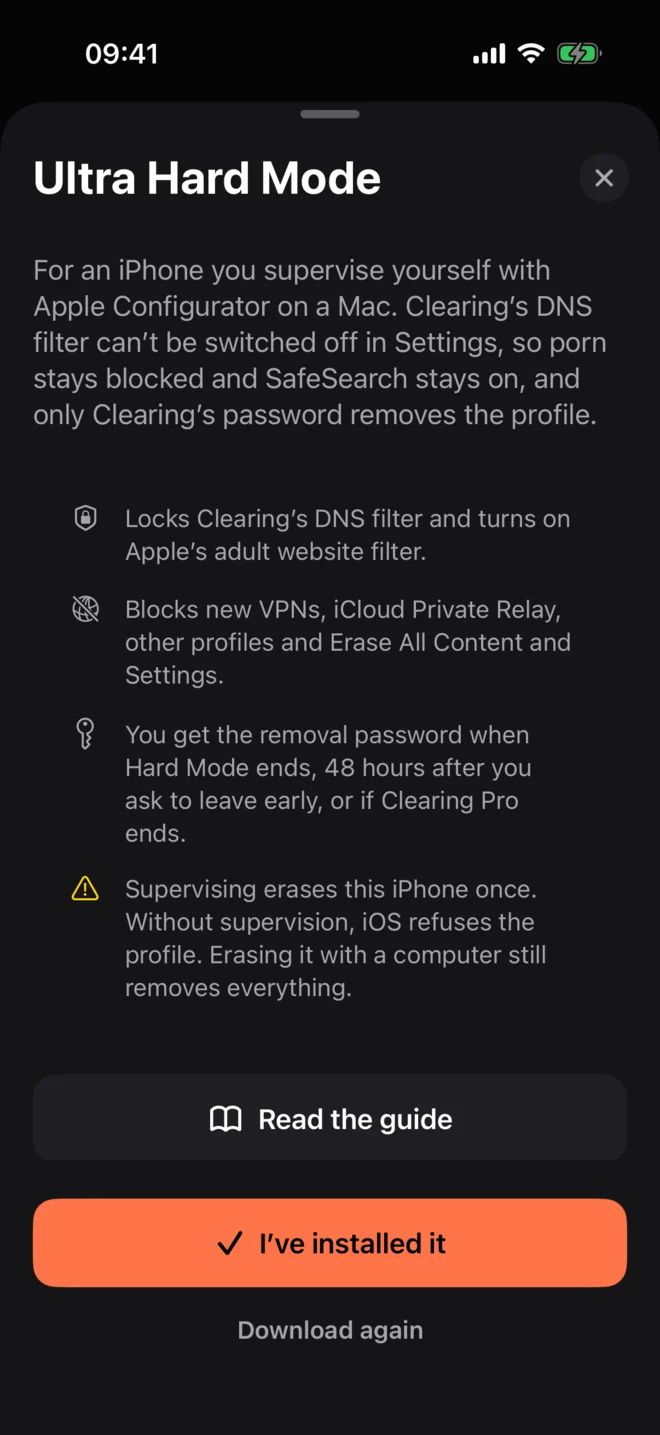
- Go back to Clearing and tap I’ve installed itIf iOS refuses the profile, the device isn’t supervised. Check Settings > General > About and repeat Step 1.
What changes on a supervised device with the profile
- Clearing’s encrypted DNS filter can’t be switched off in Settings. It blocks porn sites, forces SafeSearch on Google, Bing, DuckDuckGo, Brave Search and Yandex, turns on YouTube’s Restricted Mode, and blocks known DNS, VPN and proxy workarounds, in every app and browser, on Wi-Fi and cellular.
- Apple’s built-in adult website filter is turned on as well.
- New VPN configurations can’t be added, and iCloud Private Relay is turned off.
- “Erase All Content and Settings” is disabled.
- Other configuration profiles can’t be installed.
Removing the profile needs a password. Clearing keeps it on its server and never shows it while Hard Mode runs.
Honest limits
- While the profile is installed, you can’t add VPN apps or other profiles. A new Tailscale or work VPN, a beta profile or a school or work profile has to wait until Hard Mode ends. Set them up first if you know you’ll need them.
- It blocks whole domains, not single pages inside a site that is otherwise allowed.
- It covers this one iPhone or iPad. Every other device needs its own protection.
- It needs a Mac, and it erases the device once.
When Hard Mode ends: removing the profile
Clearing gives you the removal password when Hard Mode ends, 48 hours after you ask to leave early, or when your subscription ends. Release is never tied to a payment. Open Protect > Hard Mode > Ultra Hard Mode to see it.
- Open Settings > General > VPN & Device Management and tap Clearing Hard Mode
- Tap Delete Profile
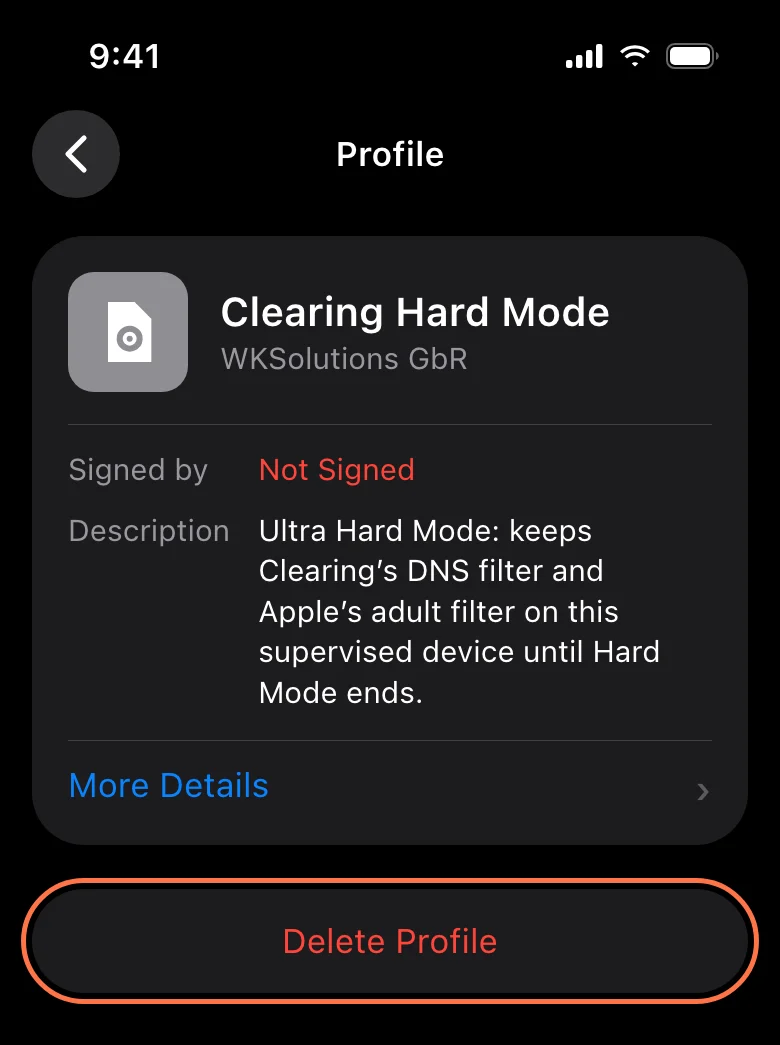
- Enter your passcode, then the password from ClearingClearing can copy it for you. Then restart the device, as Apple recommends after removing a profile.
Supervision itself stays until the device is erased. It does nothing on its own once the profile is gone. If you want it gone too, back up and use Erase All Content and Settings, which works again after the profile is removed. For a plan beyond the blocker, see how to block porn on iPhone and the free relapse prevention plan.
Questions
Do I need Ultra Hard Mode?
Most people don’t. Hard Mode already keeps Clearing from being deleted on impulse. Ultra Hard Mode is for people who would otherwise switch the DNS filter off in Settings and have a Mac to set it up.
Does supervising my iPhone give Clearing or anyone else access to it?
No. You supervise it yourself with Apple Configurator under your own organization name, without enrolling in any device management service. Clearing never supervises devices and nobody else gets access.
Can I undo supervision?
Yes. Apple says erasing all content and settings unsupervises the device. Back up first, remove Clearing’s profile when Hard Mode ends, then erase and restore.
Can I set up Ultra Hard Mode without a Mac?
No. Supervising an iPhone or iPad by hand needs Apple Configurator, which only runs on a Mac.
What happens to the profile if my subscription ends?
Hard Mode ends with the subscription, and Clearing gives you the removal password. Nobody is trapped.
Can I still install a VPN app or a work profile?
Not while the profile is installed: new VPN configurations and other profiles are blocked. Install them before Clearing’s profile, or wait until Hard Mode ends.
Related guides
- How to block porn on iPhone and iPad, and keep it blockedBlock porn on iPhone and iPad with Screen Time, SafeSearch and a DNS filter: steps for iOS 18, 26 and 27, the gaps people slip through, and how to close them.
- How to block a website on iPhone, and make the block stickBlock any website on iPhone with Screen Time: exact steps for iOS 18, 26 and 27, what the filter misses, and how to make a block you can't undo in two taps.
- How to block a website on Mac: Safari, Chrome and every other browserBlock any website on a Mac: Screen Time for Safari, the hosts file and DNS filtering for Chrome and Firefox, parental controls, and what each method can't stop.
Sources
- Apple Configurator User Guide: Prepare an iPhone, iPad, or Apple TV manually
- Apple Configurator User Guide: Supervise devices with Apple Configurator for Mac
- Apple Platform Deployment: About Apple device supervision
- Apple Support: Restore your iPhone, iPad, or iPod touch from a backup
- Apple Support: How to back up your iPhone or iPad with iCloud
- Apple Personal Safety User Guide: Review and delete configuration profiles
General information, not medical or psychological advice. If you’re struggling, talk to a doctor, a therapist or one of the helplines on our responsible use page.